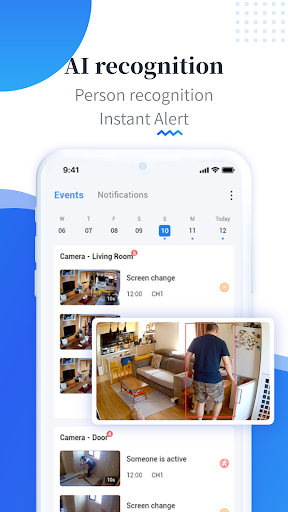
EseeCloud offers a robust set of features designed to enhance security and monitoring efficiency. While its intuitive interface and basic functionalities are well-known, there are several advanced features and customization options that can further optimize your user experience. My quick guide explores these lesser-known aspects, providing step-by-step instructions to help users maximize the capabilities of EseeCloud.
Customizing User Interface and Dashboard
Step 1: Personalize Your Dashboard
The flexibility to customize the dashboard allows you to access the most used features quickly. Upon logging into EseeCloud, navigate to the ‘Settings’ menu, select ‘Dashboard Customization’, and drag your most frequently used features to the dashboard area.
Step 2: Widget Management
Add widgets that provide quick insights into camera status, storage information, or real-time alerts by selecting ‘Add Widgets’ under the dashboard settings. This enables you to have all critical information at a glance.
Enhancing Surveillance with Motion Detection Zones
Step 1: Access Motion Settings
Navigate to the camera settings by selecting the camera from your list and choosing ‘Motion Detection Settings’. This feature is crucial for focusing surveillance on specific areas.
Step 2: Configure Detection Zones
Specify which areas within the camera’s field of view should trigger alerts. Use the interface to draw zones directly on the live feed preview. This helps in reducing false alarms by excluding high-traffic areas.
Advanced Playback and Search
Step 1: Utilizing Playback Features
To access the playback function, go to the main menu and select ‘Playback’. This feature is enriched with tools to filter and sort footage based on date, time, or event.
Step 2: Smart Search
For finding specific events quickly, use the ‘Smart Search’ function to highlight areas of motion within recorded videos, particularly useful in large footage archives.
Remote Accessibility Enhancements
Step 1: Set Up Remote Access
Ensure your device is connected and remotely accessible by navigating to ‘Network Settings’ and setting up port forwarding to allow secure external connections.
Step 2: Mobile Setup
Download the EseeCloud mobile app and use the ‘Remote Access’ setup to view live feeds and receive notifications on the go, ensuring you never miss a critical moment.
Cloud Storage Integration
Step 1: Enabling Cloud Storage
From the ‘Storage’ menu, select ‘Cloud Storage’ and choose your preferred service provider. Enter your account details and configure the storage settings according to your needs.
Step 2: Schedule Backups
Set up scheduling for backups to ensure your data is automatically saved to the cloud at regular intervals, thus providing an extra layer of data protection.
Custom Alerts and Notifications
Step 1: Configure Alert Settings
In the ‘Alerts’ menu, configure notification settings to define what actions should trigger an alert. This could be motion detection, sound detection, or other criteria specific to your surveillance needs.
Step 2: Notification Methods
Choose how you receive these alerts, whether through email, SMS, or push notifications on your connected devices, ensuring timely responses to potential security incidents.
EseeCloud’s advanced features and customization options provide a comprehensive toolkit for enhancing your surveillance system’s efficiency and responsiveness. By taking the time to explore and implement these features, you can significantly improve the monitoring of your premises and response to incidents. This guide aims to empower EseeCloud users to fully leverage the software’s capabilities, optimizing their security infrastructure for better protection and ease of use.

